
Happy World Card Making Day everyone and Chibitronics & Honey Bee Stamps will celebrate this day with a blog hop (you should arrive from Taniesa Vlasak blog).
- Honey Bee Stamps
- Amy Rysavy
- Eiko Uchida
- Emily Midgett
- Kelly Kohout
- Kelly Griglione
- Kelly Szafron
- Lisa Cisneros
- Maya Isaksson
- Melissa Bickford
- Nichol Spohr
- Taniesa Vasak (previous)
- Tiffany Au -> That’s Me
- Tracey Freeman (next)
- Vanessa Amann
- Vera Wirianta Yates
- Wei Wei Wang
- Chibitronics Blog
Honeybee is giving a $25 gift certificate drawn randomly from comments left across all blogs and Chibitronics is giving away a starter kit. Comments will close at 11:59 ET on Sunday, October 8th and the winners will be announced next week.

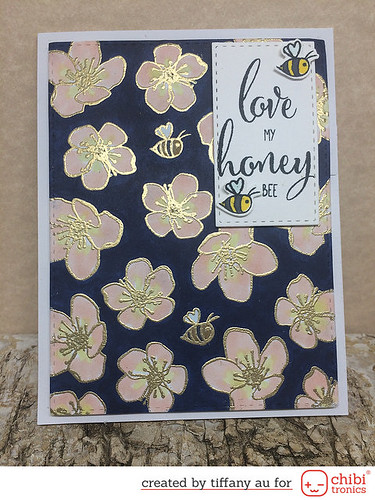
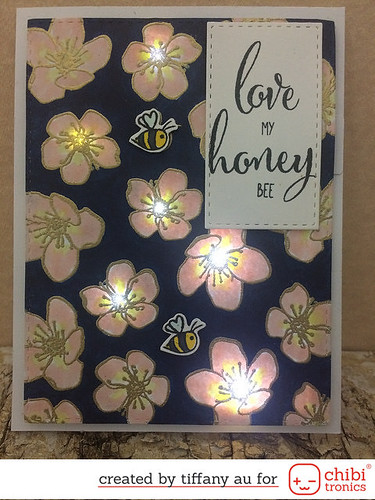
My card features the Sweet and Honey stamp set and the Chibitronics white LED lights. For my card I tried to want to do something different to activate the Chibitronics lights. What I came up with is a card that lights up when the bees located on the sentiment are placed with in the card.
- I first create the patterend background for my top panel by stamping the 2 flower images and the bee onto white cardstock in versamark ink and then heat emboss it in gold embossing powder. Then color my card base using copic markers.
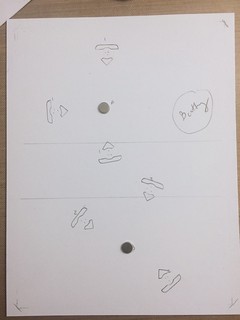
- Placed my top panel onto my card base and used my pen blade to place 3 ‘dots’ into the middle of each flower that will be lighted up (make sure to pierce into the card base). I also ‘dotted’ the middle of each bee for my battery placement. Next, draw in where each of my LED stickers will go.
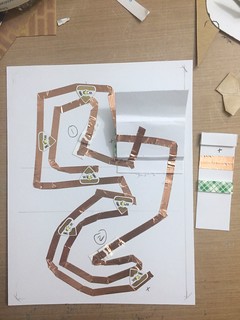
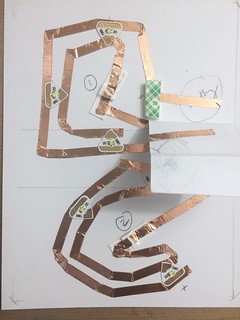
- I have created two separate light circuit for my card and each bee will activate only 3 flowers. I first glue down a magnet where the bee is placed and then glue down a strip of paper over each magnet. To create my circuit I first laid down copper tape to connect all the positive sides to the battery section. Next I laid down the copper tape connecting the separate negative side to the battery. Please note, each negative copper tape goes over the magnet with a tiny break in it before heading to the battery. I have also placed a small strip of copper tape onto the back side of my top panel where the bees are. When ever the bees on the background panel is pressed down the LED lights will turn on.
- I have also created a battery holder for easy battery replacement. To create that, you first take a strip of white cardstock 3/4 inches wide and placed two piece of foam tape onto it to hold that battery in place. Then wrap 2 strip of copper tape around it.
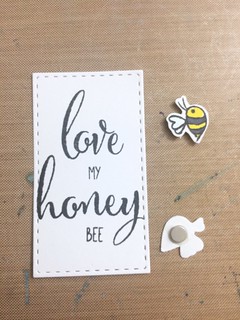
- I next stamp my sentiment with black ink and put 1 layer of foam tape behind it. I also made sure to glue 2 tiny magnet where I want the bees placed around my sentiment. I next stamp out 2 additional bees which I color and cut out. Then glue down a tiny magnet onto the back of each bee.
 To finish my card, I placed a tine strip of 2 layers of foam tape around my background and tape it down onto my card base and then add my sentiment using double sided tape. Put in my battery slider and trim the excess off.
Supplies List
I may earn a small commission for my endorsement, recommendation, testimonial, and/or link to any products or services from this website. Your purchase helps support my work and keep me supplied in foam tape.
- Chibitronics White LED Stickers
- Copper Tape
- Energizer 2032BP-4 3 Volt Lithium Coin Battery – Retail Packaging (Pack of 4)
- Honey Bee Stamp – Sweet as Honey
- Neenah Exact Index, 110 lb, 8.5 x 11 Inches, 250 Sheets, White, 94 Bright
- 3M Scotch 1/2-Inch by 36-Yard Double-Sided Foam Tape
- Scor-Pal Scor Tape, 1-Inch by 27-Yard
- KOOL TAK Clear Foam Roll Tape, 3/16-Inch by 1/16-Inch by 1.6-Yard

Beautiful lit floral card!
LikeLike
What a pretty floral card….especially with the lights! AND happy World Card making Day….my favorite holiday! 😉
LikeLike
such a gorgeous card. Love the embossing 🙂
LikeLike
So pretty! the background is amazing ❤
LikeLike
Awesome card, love it.
LikeLike
This was pretty awesome! You continue to outdo yourself each time! Love all your ideas!
LikeLike
Beautiful
LikeLike
Love those pretty flowers and cute bees! Adorable card, and extra special with the lights!
LikeLike
Fun and so pretty! Happy World CardMaking Day!
LikeLike
This card is absolutely spectacular.
LikeLike
Very beautiful design and the light-up flowers are a pretty touch.
LikeLike
Beautiful floral card.
LikeLike
That’s such fabulous card and so gorgeous !!
LikeLike
This is just beautiful! I love the feel of the florals when they light up!
LikeLike
Very pretty. Love the gold embossed flowers.
LikeLike
Awww!!! It’s so cute!!!
LikeLike
This card is stunning!
LikeLike
Beautiful card! Love the flowers with gold embossing and so pretty with the lights.
LikeLike
Beautiful card.
LikeLike
Very clever design. I like the beautiful flowers and cute bees.
LikeLike
Super cute and lovely background! 🙂
LikeLike